Add Social Menu
The My Community theme is set up to automatically add a social/ search menu to the Header Right Widget Area. The menu is started for you with the search icon, but you will need to add your social links.
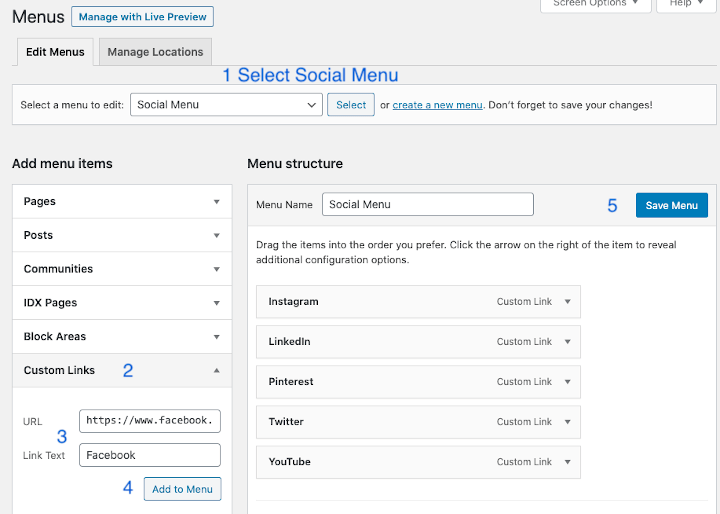
In WordPress, go to Appearance > Menus.
- From the “Select a menu to edit” dropdown, choose: Social Menu
- You will use the Custom Links section to add your social menu items.
- For each social media link that you want to add, you will add the URL (link) to your page and also the name of the social media service.
- Click Add to Menu button.
- When you’re finished, click the blue Save Menu button.
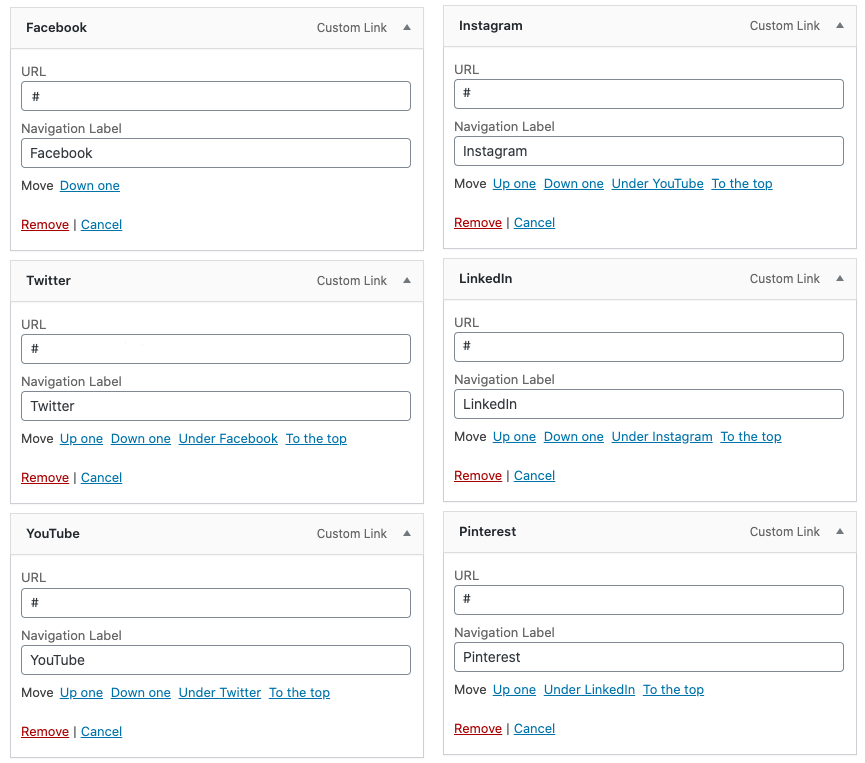
The menu items will look like the following. Be sure to add your social media links, instead of the Winning Agent links or instead of a #. Also we recommend limiting the number of social services you use.
How to Edit Block Area on Community and Listings Archives
The All Communities Archive is created using a template, and it lists all your communities or neighborhoods, similar to the Blog page listing all your blog posts. There is a Block Area at the top of the archive that you can edit. Or you can choose to delete the Block Area.
Be sure to also edit the Communities Archive Settings. Go to Communities > Archive Settings, and add an Archive Headline – Neighborhoods – and some Archive Intro Text.
To Delete a Block Area:
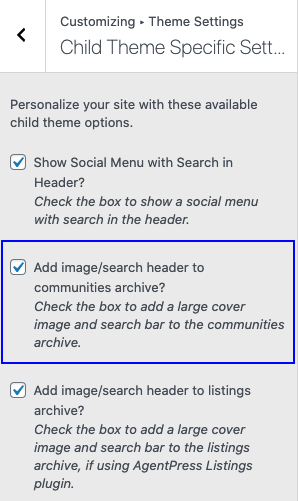
In WordPress, go to Genesis > Theme Settings > Child Theme Specific Settings.
Uncheck the box: Add image/search header to communities archive? to remove the Block Area at the top of the Communities Archive.
OR Uncheck the box: Add image/search header to listings archive? to remove the Block Area at the top of the Listings Archive (if using the Agent Press Listings Plugin).
To Edit a Block Area
In WordPress, in the black sidebar menu, click on Block Areas.
Then click on Communities Block Area or Listings Block Area.
Click inside any of the blocks to change the cover image or content.
How to Use Block Patterns
WordPress 5.5 has Pattern Blocks which are predefined block layouts, ready to insert into your pages or posts and edit with your images and content.
- In WordPress, click any page or post to edit it or choose “Add New”.
- Place your cursor on the page or post where you want to add a Block Pattern.
- Click the blue plus sign icon at the top of the block editor page. It will turn to a black icon.
- Choose Patterns.
- Then click one of the Block Patterns to add it to the editor.
- You can then click into the blocks to edit them with your images and content.

The My Community Pro theme has the following Pattern Blocks:
- Quote or Review – can be used to add Quotes or Reviews to your Reviews page.
- Realtor Info with Social Media Links – is like the About section on the home page.
- Three Columns Text with Icons and Buttons – is like the top three-column home page section and uses Font Awesome icons.
- Neighborhoods – can be used to add the Neighborhoods or Communities to any post or page or community.
- Cover Image – Text – IDX Broker Search (or AgentPress Listings Search) – can be used to add a Cover Image section to the top of any page. You will want to also choose the No Sidebar Wide template.
- Cover Image – IDX Broker Search (or AgentPress Listings Search)- can be used to add a Cover Image section to the top of any page. You will want to also choose the No Sidebar Wide template.
- Text with IDX Broker Search (or AgentPress Listings Search) – can be used to add a search bar section to any page.
- IDX Broker Search (or AgentPress Listings Search) – can be used to add a search bar section to any page.
Use the Page Templates
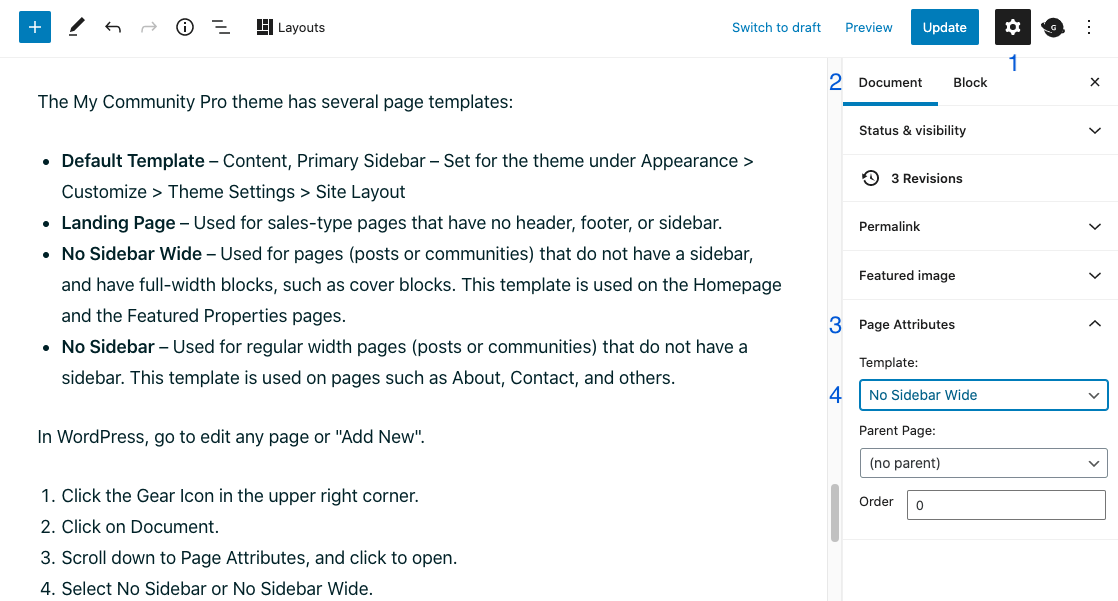
The My Community Pro theme has several page templates:
- Default Template – Content, Primary Sidebar – Set for the theme under Appearance > Customize > Theme Settings > Site Layout
- Landing Page – Used for sales-type pages that have no header, footer, or sidebar.
- No Sidebar Wide – Used for pages (posts or communities) that do not have a sidebar, and you want to have a full-width content area. This template is used on the Homepage, the Featured Properties, and Neighborhood archive pages.
- No Sidebar – Used for regular width pages (posts or communities) that do not have a sidebar. This template is used on pages such as About, Contact, and others.
In WordPress, go to edit any page or “Add New”.
- Click the Gear Icon in the upper right corner.
- Click on Document.
- Scroll down to Page Attributes, and click to open.
- Select No Sidebar or No Sidebar Wide.
Genesis Editor Settings
The My Community Pro theme has several Genesis Settings in the editor that will allow you to change settings – such as Title or Featured Image – on each page (post or community).
In WordPress, go to edit any page or “Add New”.
- Click the “G on the World” Icon in the upper right corner.
- Click on each section to open.
- Check or uncheck the Settings, as you like.
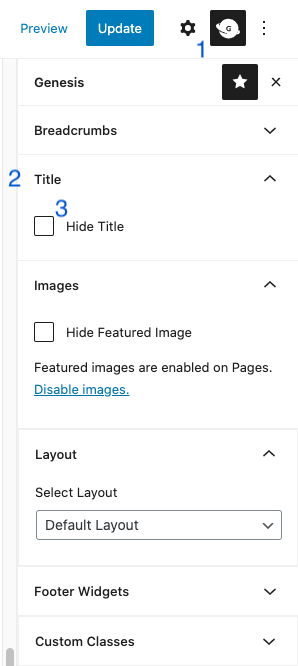
These are the following Genesis Editor Settings:
- Breadcrumbs – choose to add breadcrumbs, if you like.
- Title – choose to hide the default page title; this is useful when you want a large cover block at the top of the page; you will add your own page title below the cover block.
- Images – choose to Hide the Featured Image, if you’ve added one.
- Layout – choose from Default (Full-Width Content), Content-Sidebar, or Sidebar – Content
- Footer Widgets – choose to remove the Footer widgets on a page
- Custom Classes – useful, if you need to add a page with special styles
Make a Full-Width IDX Broker Wrapper
IDX Broker has a new template – Home Atlas – for the Search Results page. While this template can be used with the Default – Content, Primary Sidebar Layout, you can choose to use a Full-Width Layout for your Global Wrapper or use the Full-Width Layout only for the Results Wrapper, while keeping the Content, Primary Sidebar Layout as the Global Wrapper.
First Create a Global Wrapper
- In WordPress, go to IMPress > Initial Settings.
- Add idx for the Page Name and Save or Update.
- If you want the Global Wrapper to have the Content, Sidebar Layout, you’re finished.
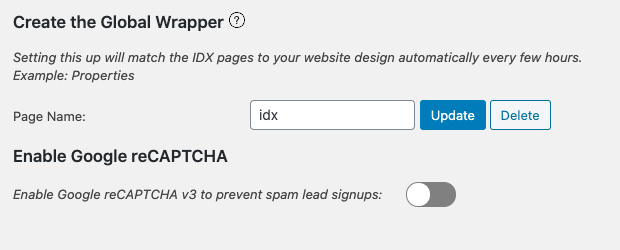
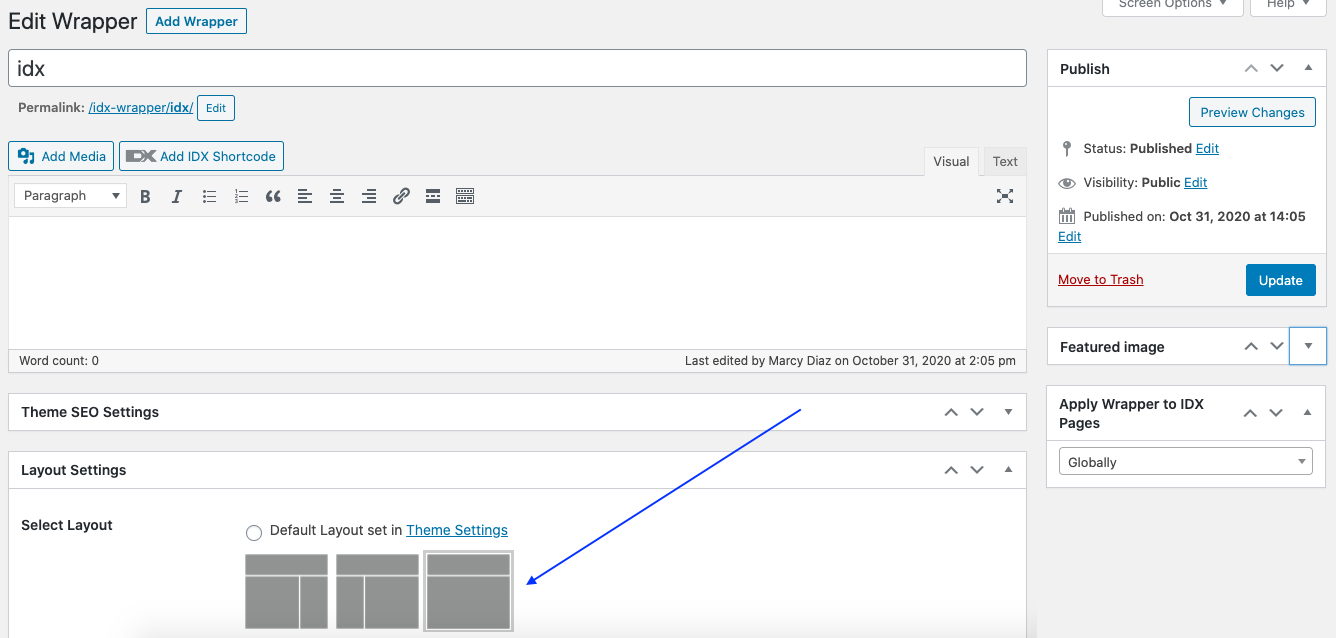
For a Full-Width Global Wrapper
- In WordPress, go to IMPress > Wrappers.
- Click on idx to edit it.
- Scroll down until you see the Layout Settings.
- Choose the image on the right that is full-width.
- Publish or Update.
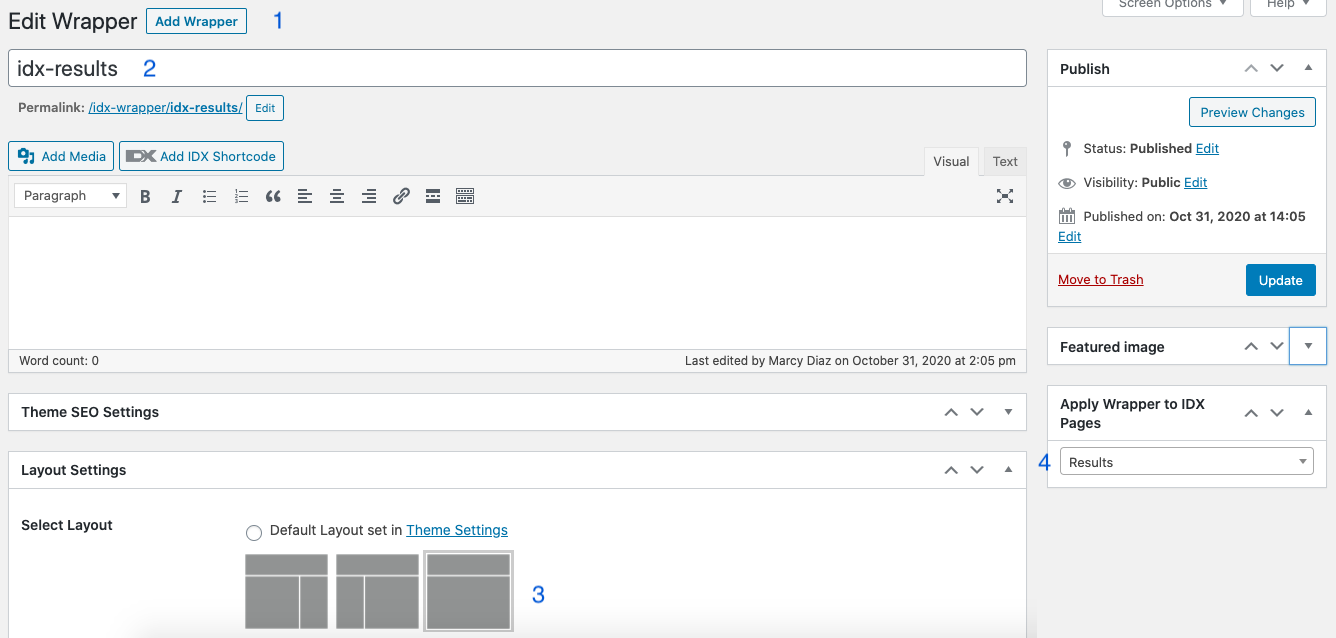
For an Additional Results Wrapper
If you want to keep the Global Wrapper as Content, Primary Sidebar, but you want an additional Full-Width Wrapper for the Search Results:
- In WordPress, go to IMPress > Wrappers.
- Click the Add Wrapper button at the top.
- Give it a Title, such as, idx-results.
- Scroll down until you see the Layout Settings.
- Choose the image on the right that is full-width.
- Over on the right – Apply Wrapper to IDX Pages drop down, choose Results.
- Publish or Update.
Learn to Use WordPress
WordPress has some great support pages to help you use the Block Editor and all the different block types.
https://wordpress.org/support/article/blocks/
There are also WordPress Admin support pages. Use the menus on the page to find the sections you need more info on.
https://wordpress.org/support/article/administration-screens/